|
Acoustic Guitar Bridge
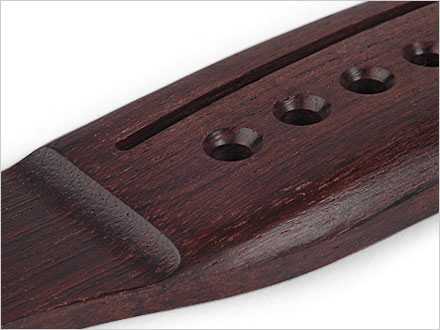
Before you attempt any repairs, first determine whether the bridge is actually cracked and needs to be replaced, or whether it has simply come loose due to stress and pressure and needs to be re-glued. If the bridge needs replacing, you will first need to purchase a new bridge. Make certain that the bridge you select is an exact replacement for your guitar model. This is important because the positioning of the strings on the bridge determines the tone of your guitar. If you wish to keep the original tone of your guitar, you must use the same bridge model. Allparts has a great selection of bridges. Be sure to use their search function to select your model of guitar before placing your order. Steps to Replace BridgeTo replace the bridge itself, follow these steps: 1. Remove the strings from your guitar 2. Remove the bridge. You may need to soften the glue under the bridge to do this. Once the glue is soft you can use a putty knife to pry up the bridge. 3. Clean the area where the bridge was removed, then sand it smooth using 220 grit sandpaper. 4. Use two inch masking tape to tape around the bridge area (make sure to overlap!) 5. Now you can dry fit the new bridge on the top using two stove bolts and the bolt through the "E" string peg holders. Use your fingers to tighten the nuts (they will be located on the bottom or inside of the bridge). Make sure that the bridge overlaps the masking tape you put down. 6. Now remove the bridge and any scraps of tape from the inside of the bridge area. 7. Take 3/4” by 1” x 1” blocks and secure them to the jaws of three deep throated clamps. 8. Spread a thin layer of glue on the bottom of the bridge. 9. Set the glued bridge carefully in place and attach the stove bolts along with the nuts and washers. You will need to tighten these with a large screwdriver. 10. Clean-up any excess glue and sand spots as necessary. 11. Place the three clamps so that they are holding the bridge securely. One needs to go on each side of the stove bolt, and one needs to be placed between the bolts. 12. Some glue will seep out from under the bridge when you set the clamps. Clean it up quickly before it begins to dry. 13. The bridge will need to set overnight. Remove the clamps and bolts. 14. Remove the tape. 15. Drill out the E String peg. 16. Replace the guitar strings.
TABLE OF CONTENTS: Guitar Parts & AccessoriesAcoustic Guitar Amps| Acoustic Guitar Bridge| Acoustic Guitar Bridge Pins| Acoustic Guitar Case| Acoustic Guitar Flight Case| Acoustic Guitar Kits| Acoustic Guitar Microphone| Acoustic Guitar Neck| Guitar Pics| Guitar Pickguards| Acoustic Guitar Pickups| Acoustic Guitar Saddle| Acoustic Guitar Stand| Acoustic Guitar Strap| Acoustic Guitar Strings| Acoustic Guitar Tuner| Acoustic Guitar TuningReturn to Acoustic Guitar Parts Return to Best Acoustic Guitars
Copyright © 2009-2014 Play-Acoustic-Guitar.com
|